

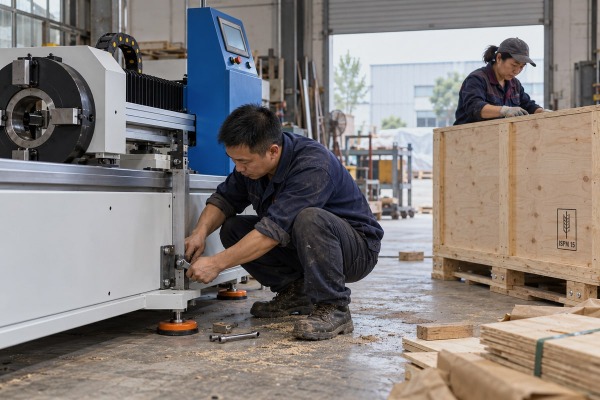
Shipping a [fully automatic pipe cutting machine](https://yqunique.com/?p=5763) from our Wenzhou workshop is the moment I worry most full freight insurance coverage 1. One rough forklift move can undo months of precision assembly.
To avoid equipment damage when shipping a fully automatic pipe cutting machine, lock every moving axis, bolt the machine to a skid inside an ISPM 15 crate, add VCI and desiccants, secure the load in the container, insure the cargo, and document condition at every handover.
That sounds like a lot. It is. But each step closes one door that damage walks through visible IPPC mark 2. Below I break the process into packaging, component securing, logistics, and supplier checks.
Last year a crate came back from our loading dock inspection with a crushed corner before it even left the yard. That taught us to over-build the frame.
Use an ISPM 15 treated industrial wooden crate on a bolted hardwood or steel skid, closed-cell foam or rubber at contact points, VCI film with moisture control desiccants inside a sealed barrier, rigid guards over blades and screens, and corner reinforcement against forklift impacts.

The biggest mistake I see is treating packaging as “stuff around the machine.” Good packaging is a load path. The machine sits on a base that carries its full weight. The base is bolted, not just strapped. The walls keep forks and rain out. The inside stays dry. Each material has one job.
Our pipe cutting machines have a long sheet-metal base cabinet, a blue control tower with a touchscreen HMI, a hydraulic cylinder 3, and a linear rail with a cable drag chain. Each of those parts fails in a different way. So we pick materials by risk, not by habit.
| Transport risk | Packaging material or method | Why it works |
|---|---|---|
| Shock and road vibration | Closed-cell foam or rubber vibration dampening mounts at designed contact points | Damps high-frequency vibration without collapsing under machine weight |
| Machine shifting inside the crate | Bolted hardwood or steel skid, blocking and bracing | A bolted connection is far more reliable than straps alone for heavy equipment |
| Humidity and salt air | VCI film, anti-rust oil coating on bare steel, moisture control desiccants | VCI protects metal surfaces; desiccants lower humidity inside the enclosure |
| Forklift and stacking damage | Industrial wooden crating with reinforced corners and lifting areas | Takes the hit so the sheet-metal panels do not |
| Blade and screen damage | Rigid guards, separate padded boxes | Soft wrap alone will not stop a sharp edge or a cracked HMI |
Transport guidance calls for at least 30 mm between the machine and the crate walls or internal battens for general machinery. We hold about 50 mm around sensitive areas like the control tower and the coolant nozzle assembly. That gap lets the crate flex on a bad road without pressing into a panel.
We never use loose-fill packing peanuts or soft padding under a heavy frame. It compresses unevenly. Then the machine tilts, and a leveling foot ends up carrying the whole load on one orange rubber pad.
Buyers often push back on full crating because of weight, cost, and disposal. That is a fair objection. Here is how I answer it:
For ocean routes we add vacuum packaging for machinery as an inner layer. The sealed barrier bag, with desiccants sized to the internal volume, is what keeps a machined linear rail 4 from flash-rusting during a six-week transit. The wood itself must meet ISPM 15 fumigation standards 5, with heat treatment or fumigation and a visible IPPC mark, or customs will hold the shipment.
Removing the saw blade and HMI adds two extra packages to track. Leaving them on risks the most expensive parts. We weigh this on every order.
Secure delicate components by following the manufacturer shutdown procedure, moving each axis to its transport position, fitting mechanical locks or brackets, removing blades, screens and loose tooling into labeled padded boxes, capping fluid lines, and shielding the control cabinet from moisture before the crate is sealed.

A fully automatic pipe cutting machine is really two machines in one. It is heavy equipment with a steel base. It is also precision equipment with servo drives, a PLC, sensors 6, and a linear rail that holds tight tolerances. The heavy part survives a bump. The precision part does not. So I treat every moving assembly as a separate problem.
| Component on our machine | What can go wrong | How we secure it |
|---|---|---|
| Cutting head and hydraulic cylinder | Shock loads bend the rod or shift alignment | Lock carriage at structural points; support the head, never the rod |
| Linear rail and drag chain | Carriage travels under impact; chain kinks | Timber blocks at multiple points; chain strapped flat with wide, non-abrasive bands |
| Feed clamps and rollers | Rotate or slip, scoring the contact faces | Pins or banding on the clamp body, with VCI paper on the faces |
| Touchscreen HMI | Cracked screen from pressure | Removed and boxed, or rigid cover with 50 mm clearance |
| PLC control cabinet | Condensation on boards and connectors | Barrier film plus desiccants inside the cabinet; door locked |
| Saw blade | Chips teeth, cuts packing, injures handlers | Removed and shipped in a rigid guard |
“Should you fit a sacrificial blank where the blade was?” Some suppliers do this to keep the spindle balanced. For our machines the blade is removed and the spindle is locked, so balance does not matter in transit. A blank only adds a part that can come loose.
“Do I need Faraday shielding for the PLC?” In my experience, no. The steel cabinet already shields the controller. Moisture, not electromagnetic interference, is what kills electronics on a ship. Spend the money on a better barrier bag.
“What about a dry nitrogen purge?” It is a premium option for sealed enclosures on routes with big temperature swings. For most of our exports, proper drying plus a sealed barrier and sized desiccants gets the same result at a fraction of the cost. We offer it when a buyer in a monsoon climate asks.
A procurement manager in Ohio once asked me why I insisted on photos of the lashing before the container door closed. The answer is accountability.
Prevent damage with a written lifting plan, certified rigging and hoisting procedures, documented container load securing with bolts, blocking and lashings, clear center-of-gravity and lift-point marks, shock and tilt indicators, an experienced heavy-machinery carrier, full freight insurance coverage, and photo records at every handover.

Packaging controls what happens inside the crate. Logistics controls what happens to the crate. I manage the second part with a five-link framework. If any link is weak, the machine is at risk, no matter how good the crate is.
| Link | What we do | What can go wrong without it |
|---|---|---|
| 1. Packing and fixing | Bolt, block, brace, and lock as described above | Machine shifts inside an intact-looking crate |
| 2. Loading into container or truck | Written lashing plan; crate chocked and lashed; photos before the door seals | Crate slides and strikes the container wall at sea |
| 3. Transport insurance | All-risk freight insurance coverage at full replacement value, named consignee | Damage occurs and nobody pays |
| 4. Loading and unloading handover | Signed condition record at each transfer; indicators checked | Carriers blame each other for concealed damage |
| 5. Arrival acceptance | Photographed inspection before unpacking; damage reported within the policy window | Claim rejected for late notice or missing evidence |
Our machines are long and the center of gravity sits toward the blue control tower, not the middle of the cabinet. So we mark the center of gravity and the lift points on at least two visible sides of every crate. We also state gross weight, packed dimensions, and the case number next to the packing list reference.
Rigging and hoisting procedures follow a simple written plan: certified slings, a spreader beam when the crate is long, edge protection under every strap, and a spotter on the ground. Nobody lifts from the control cabinet, the drag chain cover, the orange safety enclosure, or a door. The machine stays level unless our engineers have approved a tilt angle.
Container load securing combines methods. The skid is bolted to the machine, the crate is chocked with timber against the container corrugations, and lashings run to the floor rings. We do not depend on any single method. Straps sit on edge guards so they cannot deform panels or crush wiring. We re-check lashings after the truck’s first short move to the port, because that first bump settles everything.
I weigh freight price against handling events. Here is the trade-off:
Whatever the mode, we write “no stacking” and “no top loading” into the booking, and we only use handling marks that matter: This Side Up, Keep Dry, Do Not Stack, and the lift points. Too many symbols just confuse the forklift driver.
For high-value units going to Germany, Japan, or the US, we add shock and vibration monitoring with tilt indicators on the crate exterior. These do not stop damage. They tell everyone exactly when a limit was exceeded, which turns a vague dispute into a clear claim.
We learned the hard way that responsibility must be written down before dispatch. A damage claim argued after arrival helps nobody, least of all the production schedule.
Confirm in the purchase contract the packaging standard, fixing method, container loading photos, transport insurance, arrival acceptance procedure, and damage responsibility. Also request the lifting diagram, transport lock list, unpacking instructions, packed weight and dimensions, and a signed pre-shipment condition report with photographs.

Most buyers ask about price, lead time, and specs. Very few ask how the machine will be packed. Then, when a crate arrives with a water stain and a bent guard, the conversation becomes a negotiation. I would rather have that conversation before the deposit is paid.
The best purchase contracts I have signed with distributors in the US and Italy name each shipping obligation and who owns it. The table below is the checklist I send to new buyers.
| Contract item | What to ask the supplier to specify | Why it matters |
|---|---|---|
| Packaging standard | Full export crate or weatherproof skid; wood treated to ISPM 15 fumigation standards with IPPC mark | Prevents customs holds and surprise open-skid shipments |
| Fixing method | Bolted skid, blocking points, list of transport locks | You can verify the locks exist and remove them all before power-up |
| Container loading photos | Photos of lashing, chocks, and indicators before the door seals | Proof of condition at the first handover |
| Transport insurance | All-risk freight insurance coverage, insured value, claim window | Defines who pays and how fast |
| Arrival acceptance | Inspection steps, photo requirements, acceptance deadline | Separates transport damage from pre-existing marks |
| Damage responsibility | Which party handles the claim at each link, from packing to acceptance | Removes the blame game after the fact |
I also ask the supplier for a short document pack. Ours includes the lifting diagram, the transport lock list, unpacking instructions in sequence, the accessory inventory matched to case numbers, and a condition report signed before closing the crate. We tape a copy inside the crate and send a digital copy by email. Some buyers like a QR code on the crate that opens the unpacking guide on a phone, which keeps the restraint-removal order correct.
Receiving is the last link, and the one buyers rush most. My advice is simple:
Do not energize the machine if you see water inside the cabinet or suspect the frame has moved. A damaged PLC is cheaper to replace before it is powered than after.
Movement, moisture, and mishandling destroy machines in transit. Control all five links—packing, loading, insurance, handover, acceptance—in writing, and your pipe cutting machine arrives ready to cut.
Interested in sourcing the products mentioned in this article? See details and request a quote here:
