

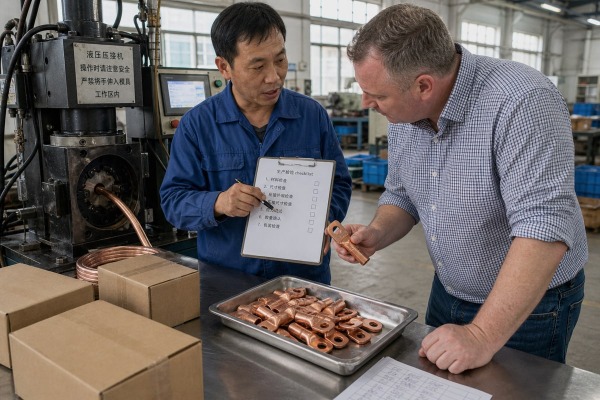
A [cable lug making machine](https://yqunique.com/?p=5825) can look perfect in a demo yet fail in daily production. Without a test checklist, that risk lands on you. At our Wenzhou plant, we build that checklist with buyers before any demo starts.
Design your checklist around four proofs: dimensional accuracy against your drawings, mechanical and electrical performance per IEC 61238-1 or UL 486A-B, batch consistency with recorded yield and scrap rates, and written acceptance criteria shared with the supplier before the demo begins.
My own rule is simple. List your test items and test standards in advance. Record finished-product yield and scrap rates during the demo. Set clear acceptance criteria and hand your product drawings to the supplier early. The four sections below turn that rule into a working checklist you can use at any factory visit or video demo.
Last spring, a client in Mexico approved a demo lug by eye, then found the barrel ID out of tolerance across half the batch. Our team now insists on numbers.
Include dimensional accuracy of barrel ID, wall thickness, and stud hole alignment; pull-out strength per IEC 61238-1 or UL 486A-B; millivolt drop and contact resistance; surface finish inspection; and crimp cross-section analysis to confirm gas-tight compression without internal voids.

A checklist only works when every metric has a tool and a pass limit. That is why I ask buyers to define dimensional accuracy 1 tolerances before the machine ever runs. Vague notes like "looks good" are useless a month later. Numbers are not.
Start with the geometry. Measure the barrel inner diameter, wall thickness, tongue flatness, and stud hole alignment with precision calipers or a micrometer. Compare every reading against your approved drawings or a reference sample. A machine can cycle smoothly while its tolerances drift, and only measurement catches that.
Next, prove the lug performs. Tensile strength testing, done as a destructive pull-out test, confirms the mechanical grip meets IEC 61238-1 2 or UL 486A-B. Then measure millivolt drop across the crimped joint to confirm it sits within recognized electrical conductivity standards. For critical applications, add heat cycling to verify the joint survives repeated thermal expansion under load.
| Metric | Tool or Method | Pass Criterion |
|---|---|---|
| Barrel ID, wall thickness | Calipers, micrometer | Within drawing tolerance |
| Stud hole alignment | Gauge pin, visual jig | No offset beyond spec |
| Pull-out strength | Tensile tester | Meets IEC 61238-1 / UL 486A-B |
| Contact resistance | Millivolt drop test | Within specified limit |
| Internal compression | Crimp cross-section analysis | Gas-tight, no voids |
| Surface quality | Visual inspection, 10x loupe | No micro-cracks, burrs, plating gaps |
Finish with a visual pass for sharp burrs, micro-cracks, and uneven tin plating. Those small defects become hotspots or corrosion points in service.
There is always a trade-off between testing every specification and keeping a demo efficient. When we prepare Factory Acceptance Tests in Wenzhou, we narrow the sample matrix deliberately.
Test your smallest, largest, and highest-volume lug sizes, using your own copper or aluminum stock. Add tinned, bare, and bimetallic samples if you run them, because material hardness, ductility, and plating each change how the machine forms and crimps.

The biggest mistake I see is letting the supplier choose the demo material. Their soft, freshly annealed copper will always form beautifully. Your production stock may not. So bring your own tube, your own cable, and your own die set, and insist the demo runs on them.
You do not need fifty SKUs. You need the extremes and the workhorse. The smallest size tests precision. The largest size tests press capacity and the cold forging process under full load. Your highest-volume size tests what actually pays your bills.
| Sample Type | Why Test It | Special Check |
|---|---|---|
| Smallest lug size | Exposes precision limits | Barrel ID, tongue flatness |
| Largest lug size | Stresses tonnage and forming | Wall thinning, cracking |
| Highest-volume size | Reflects daily production | Full metric checklist |
| Tinned copper | Plating behavior | Salt spray corrosion test on finished parts |
| Bimetallic Al-Cu | Galvanic risk | Friction-weld bond integrity |
Material verification matters too. Ask for chemical analysis or spectroscopy on the raw copper or aluminum 3, since purity drives ductility and conductivity. Add material hardness verification, because hard stock that forms fine on one machine can crack on another. For bimetallic lugs, check the Al-Cu friction-weld interface specifically; a weak molecular bond invites galvanic corrosion later. One test day here saves months of field failures.
A procurement manager from the United States once told me he would only sign after watching 300 continuous pieces. That request reshaped how we run every acceptance demo.
Run at least three separate batches, record yield and scrap rates for each, and compare cycle time against the quoted throughput. Then swap dies mid-test and measure dimensional variance again; a stable machine holds tolerances after repeated runs and tool changes.

Some buyers argue that one good demo part is enough. I disagree, and so does every production manager who has lived through tolerance drift. A single sample hides setup sensitivity, warm-up behavior, and wear. A batch exposes all three. Industry sampling practice even scales sample counts to lot size, which tells you something: isolated pieces prove nothing.
Run three or more batches with short breaks between them. Time each batch and calculate the real production cycle time, then compare it with the quoted output per hour. Record yield and scrap rates for every run; this is the single most useful data point I ask buyers to write down. If scrap climbs from batch one to batch three, you are watching drift happen in real time.
| Run | Pieces | Cycle Time | Scrap Count | Yield % | Notes |
|---|---|---|---|---|---|
| Batch 1 | 100 | Cold start | |||
| Batch 2 | 100 | After warm-up | |||
| Batch 3 | 100 | After die swap |
Check the subsystems while it runs. Look for hydraulic seepage 4, listen for pump strain, and ask where the valves and controllers come from. If the machine has a Crimp Force Monitoring system, verify its readings against an external calibrated force sensor. Test the quick-change die system by swapping tooling and re-measuring parts, because tooling and die durability drives your long-term cost far more than the sticker price does.
One lesson we learned early in exporting: an undocumented demo is a forgotten demo. Every sample test we host now ends with a signed evidence package.
Request a signed Factory Acceptance Test report, dimensional inspection sheets, pull-out and conductivity test data, retained physical samples, demo video footage, warranty terms in writing, spare parts lead times, and a supplier-signed copy of your drawings and acceptance criteria.

Some buyers believe certifications and catalog specs are enough evidence on their own. They are not. Paper compliance tells you a machine class passed a standard once. Real-world performance is only proven with your materials, your dies, and your acceptance criteria, documented on the day of the test. You need both layers, and the second one must be in writing.
If a supplier hesitates to guarantee performance in writing after passing your test, treat that as the loudest red flag of the entire process.
A cable lug making machine is only as good as the checklist that proves it. Define standards early, test with your own materials, record the data, and buy confidently.
1. The International Organization for Standardization provides global benchmarks for dimensional accuracy and manufacturing tolerances. ↩︎
2. Official website of the International Electrotechnical Commission, the governing body for the IEC 61238-1 connector standard. ↩︎
3. The International Trade Administration provides authoritative data on raw material standards and global metal trade. ↩︎
4. Technical overview of hydraulic systems and the significance of fluid integrity in industrial machinery maintenance. ↩︎
